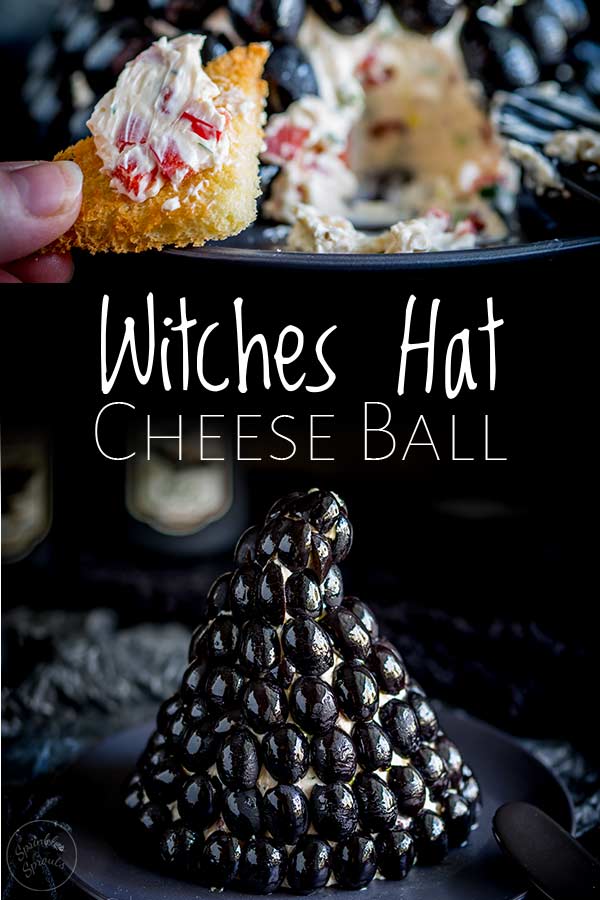
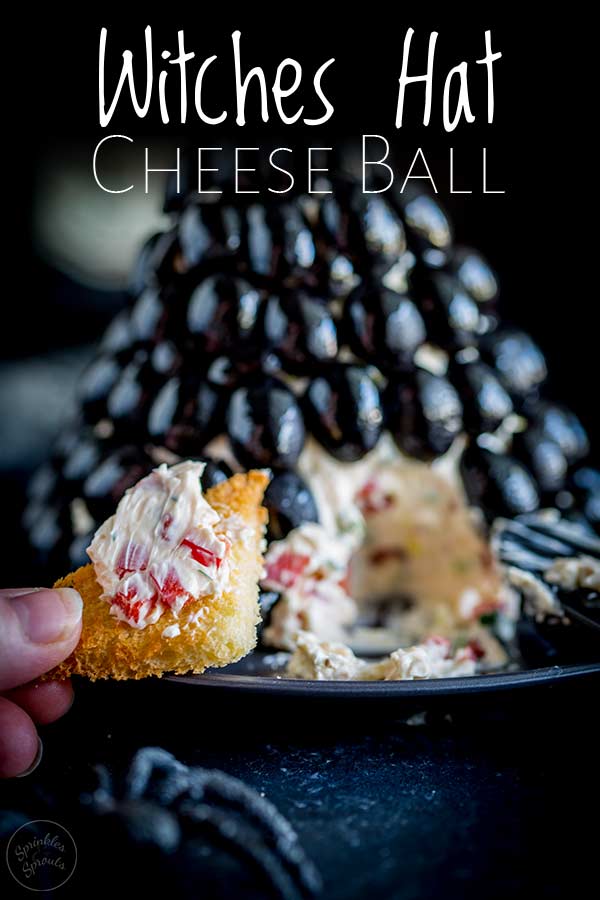
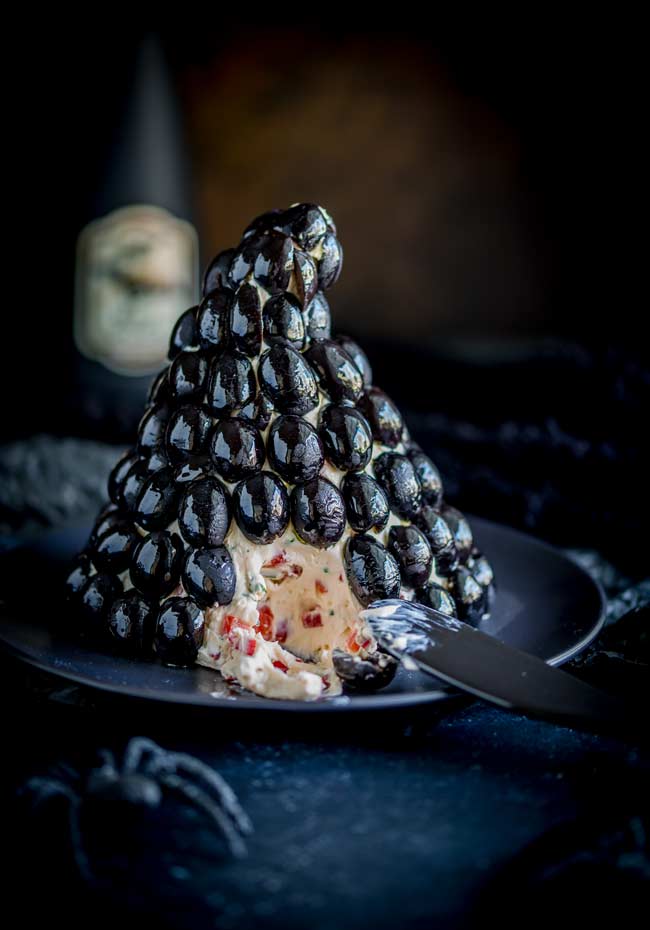
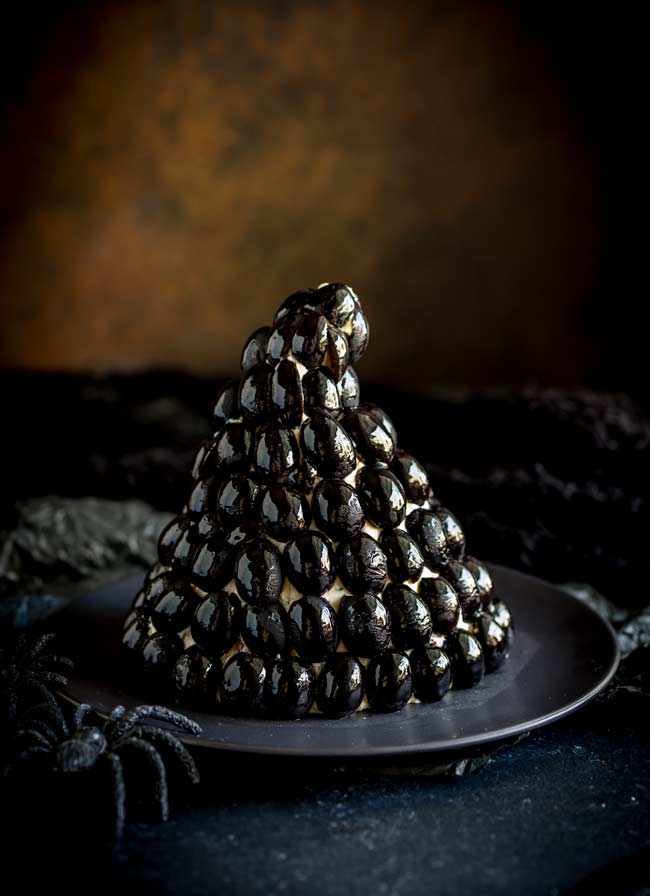
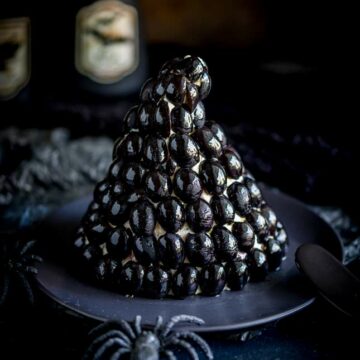
This witches hat cheese ball is a great Halloween party appetizer, put it centre stage on your buffet table, add a platter of crackers and vegetable sticks and wow your guests with a fun and easy halloween snack.
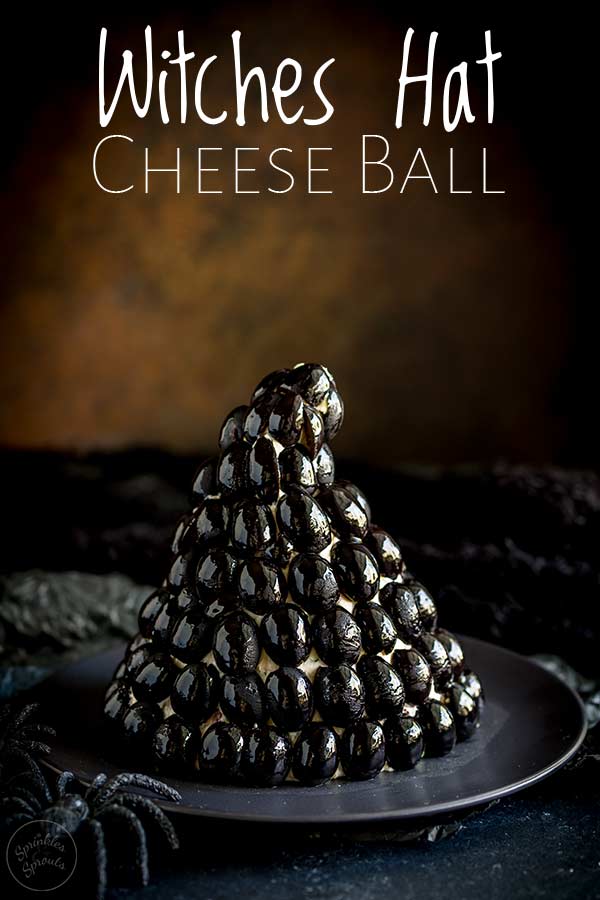
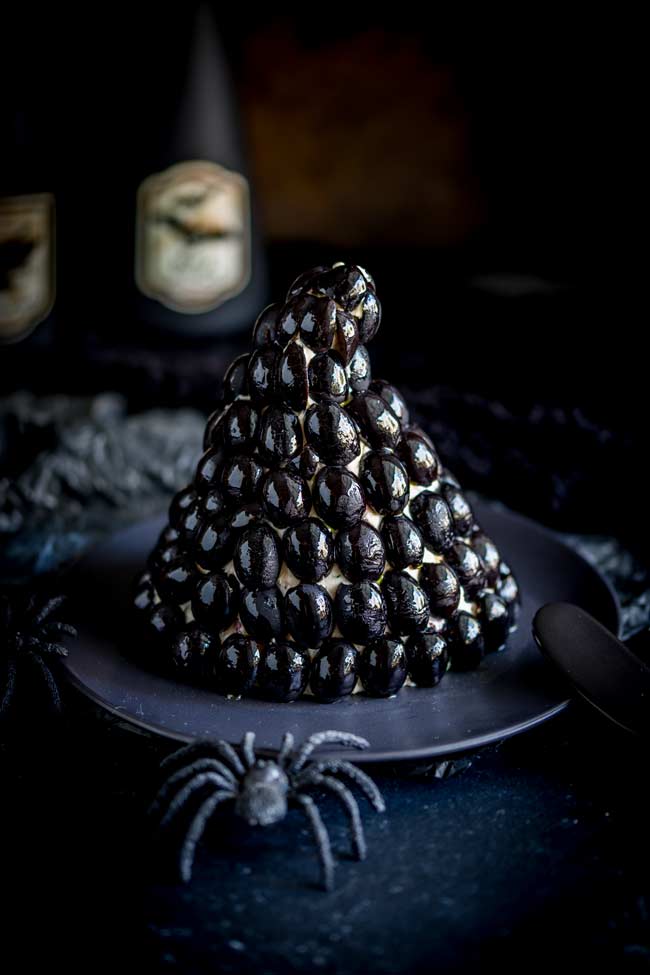
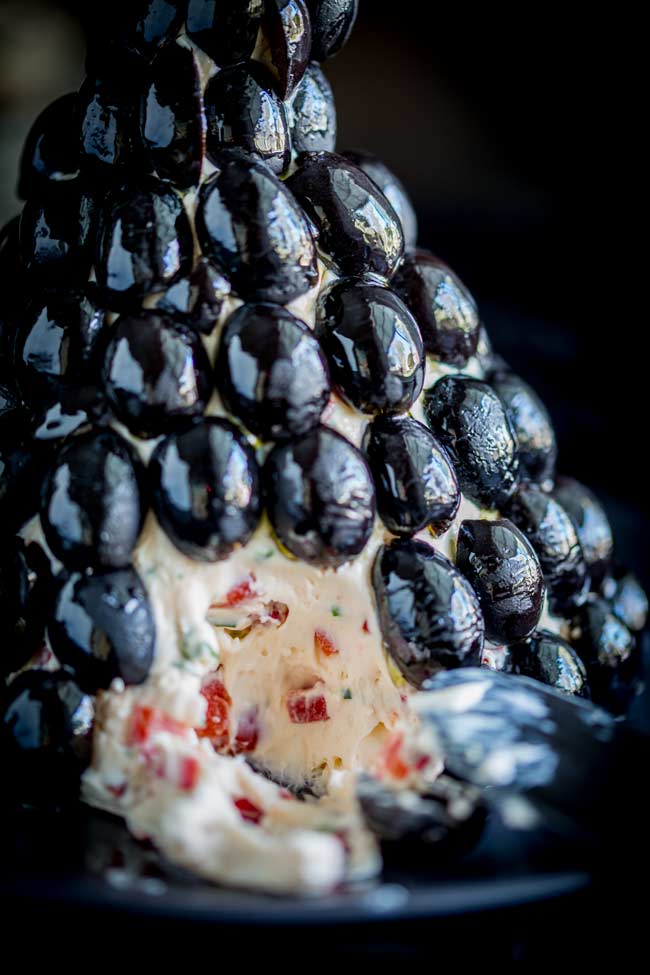
The cream cheese is mixed with bell pepper, green onions and some herbs, before being formed into a 'hat' shape and covered in black olives. Definitely one for your halloween parties.
I am so in love with this recipe! It is delicious and seasonal and is everything I love about party food - tasty, easy to prepare in advance and looks impressive on the table. I know technically a hat isn't ball shaped, so I shouldn't call it a cheese ball, but I am using poetic licence here 😉
Tips for making a Witches Hat Cheese Ball
- Make sure you start with room temperature cream cheese.
- Chop you ingredients finely 1) to keep it easy to eat and 2) so the mixture stays together easily.
- Don't over season, as the cheese ball sits the flavors will mingle together and deepen.
- To make the job easier mix everything together with a hand mixer.
- Using cling wrap to help you form the shape.
- Unlike a traditional ball shape where you can wrap and roll, a witches hat cheese ball starts with a mound of cream cheese mixture on a sheet of long wrap and uses a second sheet to mould and shape it. (see below for more in-depth explanation)
- Once formed and covered wrapped it completely and and let it set for at least 4 hours (and up to 48).
- Remove from the fridge at least 30 minutes before you want to serve.
- Just before serving, use a pastry brush to brush olive oil (I used garlic oil) over the olives to give them a gorgeous shine.
How to mould a witches hat cheese ball
- To mould the hat shape, place a piece of cling wrap onto your counter top and spoon your cream cheese mixture into a rough ball.
- Cover it with a second piece of cling wrap over the top of the ball.
- Use your hands to mould the ball up into a cone shape.
- You may need a second piece of cling wrap, to cover the whole 'hat'.
- Gently bend the tip over to make the bend in the hat.
- Once you have a cone shape, place in the fridge to chill.
Which cream cheese to use for this cheese ball?
You can use either full fat or low fat blocks of cream cheese, don't try and use the spreadable cream cheese, as it doesn't hold up to moulding well and can collapse.
To ensure the blocks of cream cheese is easy to combine with the other ingredients and mould, take it out of the fridge for at least 30 minutes before you want to use it.
Does this Cheese Ball need to chill?
Once you have formed the cheese ball, you want to chill it as this helps the shape solidify and also gives the flavors time to meld together.
Plus it means you can make this well in advance. Which is a winner for a party appetizer!
So I can make this ahead of time?
For sure!!!! This cheese ball will keep in the fridge for up to 48 hours.
(I have kept leftovers for 6 days and I am still alive…..but I don't recommend that!)
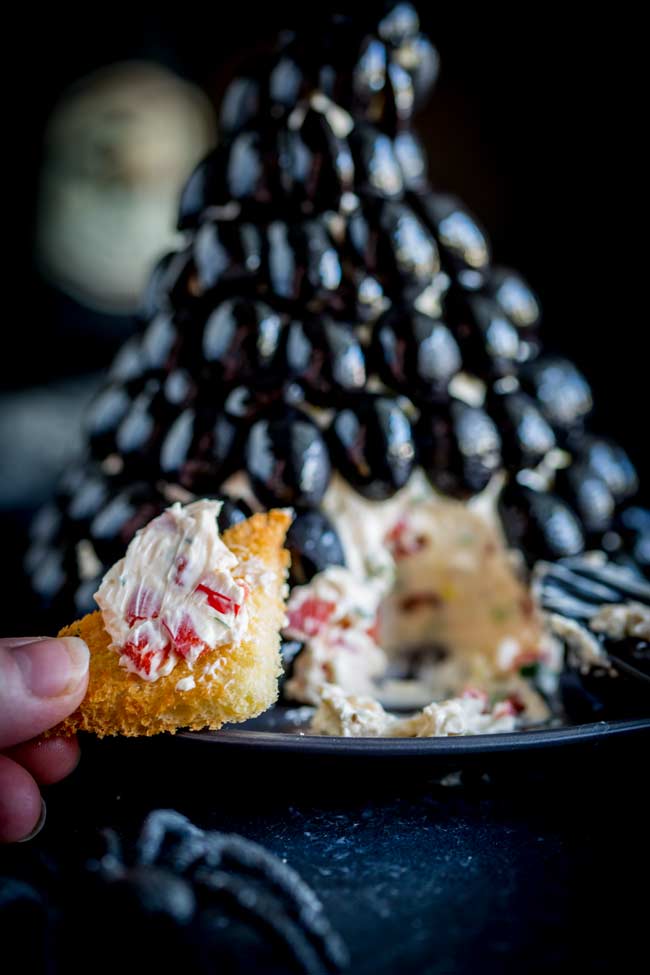
What to serve with this Witches Hall Cheese Ball
I like to serve this with toast points, water crackers and some vegetable batons (carrots, bell pepper and celery are my favs)
Strips of pitta or flat bread are also a great option. Just writing this now I think it would be great wth some pumpkin chips or crisps!!! I haven't tried that but how perfectly halloweeny would that be.
{Yes halloweeny is a word, well it should be 😉 }
For your Keto friends why not serve this with some sliced salami or thick cut ham…..yum!
There are just 5 ingredients in this Witches Hat Cheese Ball
- Black Olives
- Cream Cheese
- Green Onion
- Red Bell Pepper
- Fresh Parsley
Can I make this Witches Hat Cheese Ball into a standard cheese ball?
Definitely! Just for it into the standard ball shape instead of the cone shape.
You can either decorate the outside with olives in the same way, or use less (½ cup) and chop them up into the mixture
Enjoy x

Get the Recipe
Witches Hat Cheese Ball
Ingredients
- 2 blocks cream cheese (8oz/250g packets) - see note 1
- 1 red bell pepper
- 2 green onions
- ¼ cup chopped fresh parsley
- 2 ½ cups pitted black olives
- 1 tablespoon olive oil - optional
Instructions
- Remove the cream cheese from the fridge at least 30 minutes before you want to start.
- Finely chop the bell pepper and green onion.
- Place the cream cheese in a large mixing bowl and add in the red bell pepper, green onion and chopped parsley. Use a hand mixer or wooden spoon to thoroughly combine the ingredients.
- Place a sheet of cling wrap on the counter top and spoon the cream cheese mixture on top.
- Lay another sheet of cling wrap over the top (you may need two)
- Use your hands to gently push the ball of cream cheese into a cone shape.
- Bending the tip over slightly to resemble a crooked hat top.
- Gently pick up the cone up with one hand and peel off the bottom sheet of cling wrap.
- Place the hat directly onto your serving plate - see note 2.
- Remove the outer cling wrap.
- Cut the olives in half and then decorate the outside of the hat with them.
- Chill for 4 hours or uptown 48 hours.
- When ready to serve lightly brush the olives with oil to help them glisten.
Notes
- You can use either full fat or low fat blocks of cream cheese, don't try and use the spreadable cream cheese, as it doesn't hold up to moulding well and can collapse.
- Use a small black plate to accentuate the witches hat appearance and look like the brim of the hat.
Nutrition
Nutrition is per serving
If you love food why not subscribe to my newsletter, I will drop you an email every now and then, just to say hi and send you a couple of recipes I think you might love, like this Witches Hat Cheese Ball.
It isn't everyday! I am not that organised. Usually it is once a week (ish). And as a thank you I will send you my soup cookbook FREE. Full of my fav soups!
Subscribe today 🙂

[registration_form]
Shadi says
So spooky! I love everything witch themed!
Claire McEwen says
It is just great for halloween isn't it?
Aimee Shugarman says
WIll be making this recipe again and again!
Claire McEwen says
Thank you Aimee, it is so easy isn't it!